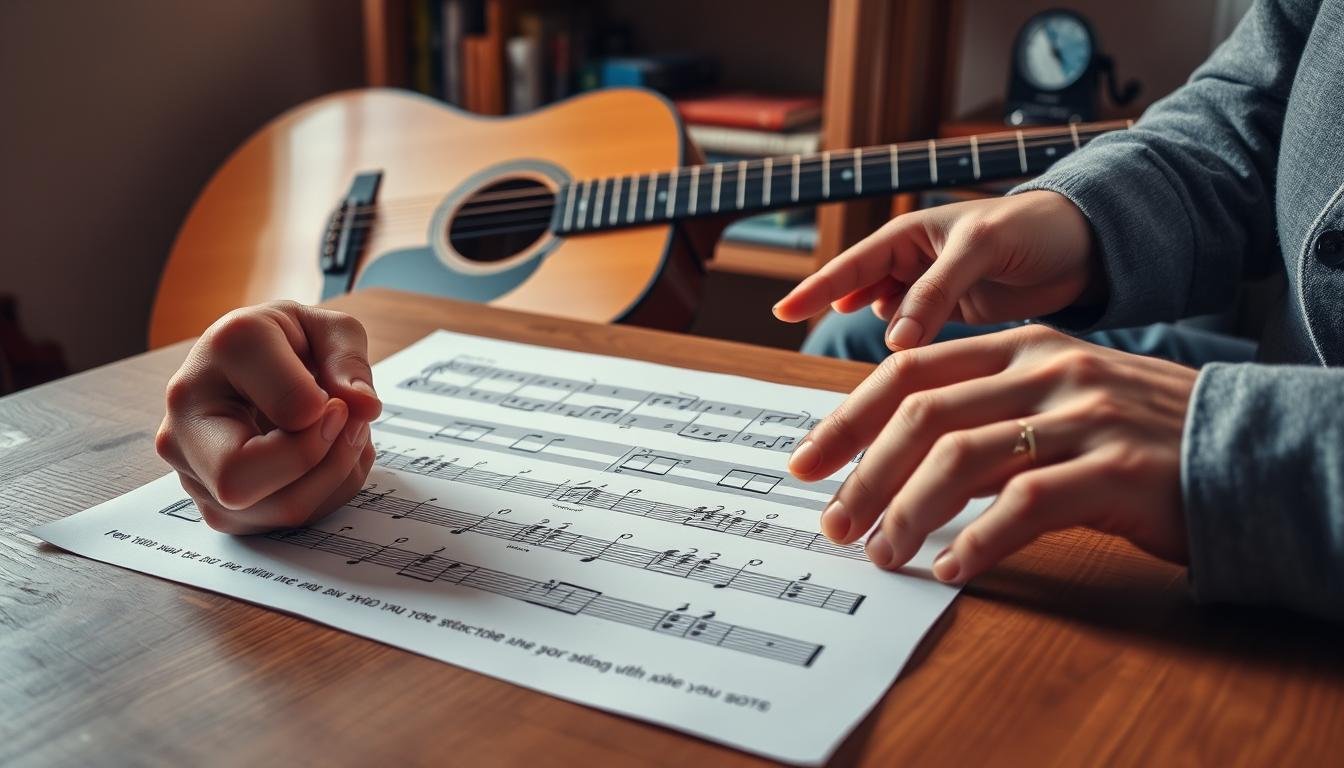
Master How to Read Guitar Tabs Easily
This guide shows you how to read guitar tabs step-by-step. You’ll learn songs faster without needing full music notation. Tabs map strings and frets, so you know exactly where to place fingers and get straight to playing.
Whether you’re starting with a Squier starter acoustic or a Squier Bullet, this primer helps you master how to read guitar tabs. It’s for players who want clear, practical steps to learn to read guitar tabs and improve song accuracy and timing.
Below is a compact gear list to support practice. Items include essentials for rhythm, tuning, and recording. This way, you can focus on technique and phrasing.
| Item Name | Description | Calories | Price |
|---|---|---|---|
| Acoustic Beginner Pack | Squier starter acoustic, beginner-friendly action | 0 | $199 |
| Electric Starter Kit | Squier Bullet, amp, cable, picks | 0 | $249 |
| Metronome (Digital) | Tempo practice for rhythm and TAB timing | 0 | $19.99 |
| Tuner (Clip-on) | Quick, accurate tuning before you play | 0 | $14.99 |
| Guitar Strap | Comfort for standing practice | 0 | $9.99 |
| Picks (Assorted) | Variety pack for tone and pick control | 0 | $6.99 |
| Capo | Change keys for easier chords | 0 | $12.99 |
| Slide | For slide technique practice | 0 | $7.99 |
| String Winder | Faster restringing and maintenance | 0 | $8.99 |
| Portable Recorder | Record practice to check rhythm and phrasing | 0 | $49.99 |
| Sheet Music Direct Subscription | Access to guitar tab library | 0 | $7.99/month |
| Beginner Lesson (1 hour) | Local instructor or online tutor session | 0 | $40–$80 |
What is Guitar Tablature and Why It Helps Beginners
Guitar tablature is a simple way to show where to place your fingers on the neck. It uses six horizontal lines that match the strings and numbers to mark frets. This method helps beginners play songs without learning standard music notation first.

Definition
Reading guitar tablature means following lines and fret numbers instead of notes on a staff. The top line represents the high E string and the bottom line represents the low E. A zero means play the open string; other numbers point to specific frets.
How TAB differs from standard notation
Standard notation shows pitch and rhythm but not the exact fret or string to use. TAB maps each string to a line, so you see where to place fingers. The same pitch can appear at multiple frets; TAB shows the precise fingering, which helps you reproduce the sound exactly as written.
Why TAB is faster for beginners to learn songs
Beginners pick up chords and riffs faster with TAB because it removes the need to translate notes into positions. Many rock, pop, and blues lessons rely on TAB in curricula from Berklee Online to local teachers for this reason. Pairing listening with reading guitar tablature helps you learn rhythm and phrasing when rhythmic markings are sparse.
| Item Name | Description | Calories | Price |
|---|---|---|---|
| Classic Acoustic Lesson | Intro to open chords using simple TAB exercises | 0 | $29 |
| Electric Riff Workshop | Focus on power chords and single-note lines with TAB | 0 | $35 |
| Blues Lead Session | Phrasing and bends shown in TAB for expressive solos | 0 | $40 |
| Fingerstyle Starter | Basic patterns and TAB mapping for thumb and fingers | 0 | $32 |
| Beginner TAB Pack | Collection of easy songs with full TAB and chord charts | 0 | $20 |
| Rhythm & Strumming Class | Counting and strum patterns paired with TAB examples | 0 | $28 |
| Slide Guitar Basics | Slide techniques explained and notated in TAB | 0 | $37 |
| Advanced TAB Reading | Complex rhythms and ornamentation shown in TAB | 0 | $45 |
| Chord Chart Companion | Parallel chord charts above TAB for quick reference | 0 | $15 |
| One-on-One Tutoring | Personal sessions to practice how to read guitar tabs | 0 | $60 |
how to read guitar tabs
Learning guitar tabs is easy. Just read from left to right and play notes in order. Tabs show timing like a sentence. When numbers line up, play them together.

Reading direction and the six-line staff layout
Guitar tab has six lines, each for a guitar string. Read from left to right to follow timing. If numbers stack, play them together as a chord.
Some tabs add marks for rhythm. But many simple ones don’t. So, play along with a recording when needed.
String order: high E to low E as you view the fretboard
The top line is the high E string, the thinnest. The lines below are B, G, D, A, and low E. This order matches the fretboard view.
This helps you place fingers quickly. It makes reading melodies or bass lines easier.
How fret numbers map to frets on your guitar
Numbers on lines tell you which fret to press. A 0 means play the open string. Higher numbers move toward the body.
Most guitars have 19 to 24 frets. Each fret raises pitch by a semitone. The 12th fret marks one octave above the open string.
Fret markers at 3, 5, 7, 9, and 12 help beginners navigate.
| Item Name | Description | Calories | Price |
|---|---|---|---|
| High E string | Top line on TAB; thinnest string for melodies | 0 | $0.00 |
| B string | Second line; supports chords and runs | 0 | $0.00 |
| G string | Middle line; often used for fills and harmony | 0 | $0.00 |
| D string | Fourth line; bridges melody and bass | 0 | $0.00 |
| A string | Fifth line; common for rhythm parts | 0 | $0.00 |
| Low E string | Bottom line; thickest string for bass notes | 0 | $0.00 |
| Open string (0) | Play string without fretting | 0 | $0.00 |
| First fret (1) | Nearest fret to the nut | 0 | $0.00 |
| Twelfth fret (12) | Octave marker; important orientation point | 0 | $0.00 |
| Fret markers | Dots at 3,5,7,9,12 to aid navigation | 0 | $0.00 |
Start with a beginner guitar tabs tutorial. Begin with short tabs, focus on single notes, and match what you hear. For beginners, choose riffs with open strings and low fret numbers to build confidence.
Understanding the Guitar Tab Staff and String Layout
The guitar tab staff has six lines that match the strings you play. Learning this is key to reading guitar tablature. It helps you connect numbers on paper to notes on your guitar.
Which line represents each string
The lines are ordered from top to bottom: high e, B, G, D, A, low E. Most publishers follow this order. This means the high e string is on the top line.
Visualizing the fretboard from the player’s perspective
Tabs show how the strings look when you hold the guitar. Imagine the nut at the left and frets moving right. Use fret markers at the 3rd, 5th, 7th, 9th, and 12th frets to guide your hand. This makes reading guitar tablature faster during practice.
Open strings and fret numbering conventions
A 0 means an open string. Frets count up from the nut: 1, 2, 3, and so on. Each fret raises the pitch by one semitone. Remember, a single pitch can appear in different places on the neck. TAB shows where to play, not which pitch to choose. Use finger suggestions or chord charts when you can.
| Item Name | Description | Calories | Price |
|---|---|---|---|
| High e string (top line) | Smallest gauge, highest pitch; top line in tab mapping. | 0 | $0.99 |
| B string | Second-highest pitch; often used for melody lines. | 0 | $0.99 |
| G string | Mid-range tone; common in chords and riffs. | 0 | $0.99 |
| D string | Lower mid-range; anchors many open chords. | 0 | $0.99 |
| A string | Used for bass notes and power chords. | 0 | $0.99 |
| Low E string (bottom line) | Thickest string, lowest pitch; bottom line in tab. | 0 | $0.99 |
| Open string marker | Number 0 indicates string played without fretting. | 0 | $0.99 |
| Fret numbering | Sequential numbers show semitone steps from the nut. | 0 | $0.99 |
| Fret markers | Dots on the neck at 3,5,7,9,12 help navigate positions. | 0 | $0.99 |
| Multiple positions | Same pitch can be fretted in different places; use fingering notes. | 0 | $0.99 |
Practice small passages while naming the string with each number. This builds a practical link between guitar tab notation and the fretboard. Use a tuner and the fret markers to reduce guesswork when first reading guitar tablature.
When choosing where to play a note, think about hand comfort and tone. Understanding guitar tablature helps you pick positions that match the song’s feel and your skill level.
Reading Chords, Riffs, and Vertical Alignment in Tabs
Tabs use simple marks to show timing and harmony. Stacked numbers mean those notes sound together. This helps beginners move from simple tabs to more complex chords while keeping rhythm.
How vertically aligned numbers form chords
When numbers are stacked on different lines, play those notes together. Strum or pick all strings to get a chord. Many pop and rock songs use this method for chords.
Recognizing arpeggios versus strummed chords
Arpeggios are single notes from a chord played in sequence. Publishers use a wavy line or staggered timing to mark them. Listening while reading helps you know when to play chords together or roll them.
Reading riffs made of single notes and power chords
Riffs mix single notes with power chords. Power chords have numbers on adjacent strings, like root and fifth. Rock tabs often include palm muting and rhythmic cues for attack and groove.
| Item Name | Description | Calories | Price |
|---|---|---|---|
| Open D Chord | Stacked numbers on D, G, B strings; bright, ringing voicing | 0 | $0.00 |
| Power Chord (5) | Two-note shape on E and A or A and D; used in riffs and palm-muted lines | 0 | $0.00 |
| Arpeggiated C | Sequential single notes from a C shape; often marked with a wavy line | 0 | $0.00 |
| Muted Riff | Single notes and X marks; tight, percussive rock feel | 0 | $0.00 |
| Barre F Major | Full barre shown by stacked numbers across strings; requires finger across fret | 0 | $0.00 |
| Hybrid Picking Line | Single notes with occasional stacked intervals; useful in country and pop | 0 | $0.00 |
| Descending Arpeggio | Notes shown in sequence descending the chord tones; practice slowly | 0 | $0.00 |
| Major Triad Strum | Three-note vertical stack with strum direction implied in rhythm | 0 | $0.00 |
| Two-String Riff | Alternating single notes on adjacent strings; common in blues and rock | 0 | $0.00 |
| Syncopated Chord Hit | Stacked numbers tied to offbeat rhythm markers for groove | 0 | $0.00 |
Practical tip: practice while listening. Use recordings to check if tabs show arpeggios or chords. This habit improves your skill in reading guitar tabs, even for songs labeled easy.
Common Guitar Tab Symbols and What They Mean
This part explains the small marks that shape sound in tabs. Knowing guitar tab symbols helps you read music faster and play with confidence. Use this as a practical guitar tablature guide while you learn songs.
Overview of notation symbols used in TAB
Basic letter codes show technique: h = hammer-on, p = pull-off, / and \ = slide, b = bend, r = release, ~ or v = vibrato. T or t marks tapping. x means muted or dead note. PM signals palm mute. Harmonics appear in angle brackets: <12> for natural, A.H. for artificial, T.H. for tapped harmonics.
| Item Name | Description | Calories | Price |
|---|---|---|---|
| h / p | Shows hammer-ons and pull-offs for legato phrases | 0 | $0.00 |
| / \ | Slide up or down between frets | 0 | $0.00 |
| b / r | Bend and release to change pitch smoothly | 0 | $0.00 |
| ~ or v | Vibrato marking for sustained pitch modulation | 0 | $0.00 |
| x | Dead or muted note, often rhythmic | 0 | $0.00 |
| PM | Palm mute with duration line for rhythmic control | 0 | $0.00 |
| < >, A.H., T.H. | Natural, artificial, and tapped harmonics | 0 | $0.00 |
| T or t | Tapping using the picking hand | 0 | $0.00 |
| S, TP | Shift slide and tremolo picking, publisher-specific shorthand | 0 | $0.00 |
| p, i, m, a | Picking-hand fingering: thumb, index, middle, ring | 0 | $0.00 |
Symbols that indicate rhythm or measure divisions
Vertical bar lines mark measure boundaries. Some transcribers include rhythmic codes like w, h, q, e, s for whole, half, quarter, eighth, sixteenth notes. Many tabs skip these marks and expect you to use audio to find timing. Use the guitar tablature guide to spot when rhythm is written next to note groups.
How to interpret uncommon or publisher-specific marks
Publishers may use unique shorthand. Curved slurs often indicate ties or legato. Uppercase S can mean a shift slide. TP stands for tremolo picking. Letters for picking-hand fingering may appear above or below staff lines. When a mark is unclear, check the tab source legend or compare with studio recordings to confirm intent.
Practical tip: keep a simple reference sheet of these symbols while you practice. Use audio to resolve vague rhythm marks. This focused approach makes it easier to learn how to read guitar tabs and to apply guitar tab symbols correctly across varied transcriptions.
Essential Techniques in Tabs: Hammer-ons, Pull-offs, Slides, and Bends
This guide covers key techniques for beginners. It shows how to play hammer-ons, pull-offs, slides, and bends. These skills make your playing sound great. Learning to read guitar tabs helps these techniques feel natural.
Hammer-ons are marked with an “h” or a slur. Start by playing the first note, then press the next fret with your finger without picking. Use a firm, confident motion. On electric guitars, a bit of gain helps the second note ring out.
Pull-offs are shown as “p” or a slur going down from a higher note. Pick the first note, then pull your finger down and away to sound the lower pitch. A quick flick toward the floor boosts volume and clarity.
| Item Name | Description | Calories | Price |
|---|---|---|---|
| Hammer-on | Press second note without re-picking to create legato | 0 | $0.00 |
| Pull-off | Release to a lower note with a slight finger flick | 0 | $0.00 |
| Slide Up | Ascend with “/” or sl., keep pressure while sliding | 0 | $0.00 |
| Slide Down | Descend with “\” or sl., maintain contact for smooth tone | 0 | $0.00 |
| Bend | Raise pitch using “b” and markers like Full or 1/2 | 0 | $0.00 |
| Bend-Release | Return to original pitch often shown with “r” | 0 | $0.00 |
| Pre-bend | PB indicates bend before picking then release or hold | 0 | $0.00 |
| Shift Slide (S) | Strike only the target note after sliding | 0 | $0.00 |
| Technique Tip | Use multiple fingers for strong bends and even pressure | 0 | $0.00 |
| Practice Note | Work slowly to build clarity before speeding up | 0 | $0.00 |
Slides are marked with “/” for up and “\” for down. The abbreviation sl. or S is used for shift slides. Start the note, then slide your finger along the string to the target fret while keeping pressure. For S, often only the target note is sounded.
Bends are shown with “b” and can include amounts like Full or 1/2. Notation may show a curved arrow or “r” for release. Pre-bend appears as PB and means bend before you strike the string. Use two or three fingers on the fretting hand to gain strength and control.
Practice these moves slowly, counting and staying relaxed. A focused routine from a beginner guitar tabs tutorial will speed progress. As you refine technique, reading becomes smoother and playing follows naturally when you know how to read guitar tabs that include these essential guitar techniques.
Advanced Expressions: Vibrato, Tapping, Harmonics, and Trills
This section dives into advanced techniques that make a song unforgettable. You’ll learn about vibrato, tapping, harmonics, and trills in guitar tab notation. We’ll also cover how to practice them safely. Short exercises will help you improve coordination and tone control.
Vibrato is shown with a wavy line or tilde after a note. It means to sustain the pitch with small bend-and-release motions or finger rolls. The length of the wavy line indicates how long to hold the vibrato. Start slow and match the vibrato to the song’s mood. Practice on single notes before adding it to full phrases.
| Item Name | Description | Calories | Price |
|---|---|---|---|
| Vibrato Practice | Hold note, apply controlled finger roll; vary speed and width | — | Free |
| Tapping Drill | Tap with picking-hand finger at indicated fret; combine H/P | — | Free |
| Natural Harmonics | Lightly touch string above fret and pluck at shown fret point | — | Free |
| Artificial Harmonics | Fret note, then use picking-hand index to touch harmonic node | — | Free |
| Tapped Harmonics | Fret lower note; tap at harmonic point with picking-hand finger | — | Free |
| Trill Exercise | Alternate between two fretted notes rapidly as marked tr | — | Free |
| Grace Note Run | Insert small-sized approach notes with H, P, sl, or B | — | Free |
| Two-Hand Speed | Metronome up-down tapping pattern to build precision | — | Free |
| Electric Setup Tip | Use moderate gain and clear signal for tapped parts | — | Free |
| Coordination Warmup | Slow timed patterns, increase tempo in 5% steps | — | Free |
Tapping is marked with a lowercase t or capital T beside fret numbers. Use the picking-hand to hammer at high frets. Combine taps with hammer-ons and pull-offs for smooth lines. Two-handed tapping adds reach and polyphony but needs clear tone; electric guitars benefit from moderate gain and compression.
Harmonics include natural, artificial, and tapped types. Natural harmonics in TAB often have angle brackets around a fret number. Artificial harmonics may be labeled A.H., while tapped harmonics appear as T.H. Light touch and precise placement at the node produce bell-like tones. For artificial harmonics, fret the main note, then touch the string lightly at the harmonic point with the picking-hand finger.
Trills show rapid alternation and are often marked tr with tildes between notes. Grace notes are tiny lead-ins drawn before a main note. They can use H, P, sl, or B to indicate the execution. Use these ornaments sparingly to add flair without cluttering a melody.
These techniques require slow, focused practice. Start with simple patterns, use a metronome, and increase speed in small steps. Precision in timing and touch matters more than raw tempo.
When reading guitar tablature for expressive parts, watch for combined symbols: a tapped harmonic may list T.H. plus a fret number and a small diamond or bracket. Keep a chart of symbols near your music to speed recognition during practice.
Practice tip: isolate each technique, master it at a slow tempo, then layer it into a musical phrase. This approach builds coordination between fretting and picking hands while improving tone control and timing.
Muting, Palm Muting, Dead Notes, and Percussive Effects in Tabs
Muted sounds add rhythm and bite to guitar parts. Learn the basic guitar tab symbols for dead notes, palm muting, and percussive hits. This way, you can turn notation into real sound on stage or in the studio.
Muted/dead notes (X) are marked with an X instead of a fret number. Press a fretting finger lightly on the string without pressing it to the fretboard. Then, pick normally to get a crisp percussive click. Practicing this helps you control sustain and clean up busy mixes in high-gain contexts.
Palm muting (P.M.) is shown with P.M. followed by a dashed line that marks duration. Rest the edge of your picking-hand palm near the bridge and strike the string. Move your hand farther from the bridge for a heavier mute, or closer for more ring. Use this to shape dynamics and tighten low-end notes.
Rakes and percussive slaps add rhythmic flair. Rakes are written as muted grace notes before a target pitch; execute by quickly muting several strings in one sweep and landing solidly on the main note. Slaps are often shown with X note-heads and an S marker; they add attack favored in rock, punk, and alternative styles.
Use muting techniques to manage stage volume and reduce unwanted noise. These methods are essential when playing with overdrive or distortion. They let you keep riffs tight and percussive without muddying the mix.
| Item Name | Description | Calories | Price |
|---|---|---|---|
| Muted/Dead Note (X) | Lightly touch string, pick for percussive click | 0 | $0.00 |
| Palm Muting (P.M.) | P.M. + dashed line shows how long to mute | 0 | $0.00 |
| Rake | Muted grace notes swept into a target note | 0 | $0.00 |
| Slap (S) | Percussive hit using thumb or palm, often X marks | 0 | $0.00 |
| Control Tip | Use muting to shape tone in high-gain settings | 0 | $0.00 |
When learning how to read guitar tabs, scan for Xs, P.M. labels, and dashed lines. These tell you when the chart calls for percussive effects. Practice slowly with a metronome to lock the timing before adding speed or distortion.
Start by isolating muted passages and palm-muted riffs. Repeat short phrases until your hand placement and timing feel natural. Recording practice runs helps you hear how these techniques affect dynamics and clarity.
Keep a small notebook of common guitar tab symbols you find in songs by artists like Foo Fighters, Green Day, or The Black Keys. Noting how producers mix these parts will improve your judgment when arranging parts or performing live.
Strumming, Picking Direction, and Rhythm in Guitar Tabs
Learning pick direction and rhythm makes tabs come alive. A few symbols are key: the downstroke mark is a thick line with legs down, and the upstroke is a V. Knowing these symbols helps you play faster and catch the song’s rhythm.
Begin by counting out loud: “one and two and three and four and.” Use this count to guide your strokes. Many songs use alternating down and up strokes to set the beat. If a tab doesn’t show rhythm, listen to the song and practice with a metronome to get the timing right.
To add feel, use stronger downstrokes for emphasis. Match these accents with your pick direction to capture the song’s original vibe. This trick is useful when tabs show chord hits but not rhythm.
Tremolo picking, marked as TP or with dashes, means quick alternate strokes on one note. Keep your wrist relaxed and use a metronome to increase speed while maintaining tone. Arpeggiation, shown as a wavy line or small arrowheads, means playing each string in sequence to spread the chord smoothly.
| Item Name | Description | Calories | Price |
|---|---|---|---|
| Downstroke | Thick horizontal symbol with downward legs; strong, driving stroke | 0 | $0.00 |
| Upstroke | V-shaped symbol; lighter return stroke used in alternating patterns | 0 | $0.00 |
| Alternate Strum Pattern | Common pattern: D U D U with accents on selected downstrokes | 0 | $0.00 |
| Eighth-Note Counting | Count “one and two and…” to align strokes with beats and subdivisions | 0 | $0.00 |
| Tremolo Picking (TP) | Rapid repeated picks on one note, shown by TP or tildes/dashes | 0 | $0.00 |
| Arpeggiation | Wavy vertical line or arrowheads showing a spread chord; play strings in order | 0 | $0.00 |
| Accent Placement | Stronger pick stroke on beat to emphasize rhythm and groove | 0 | $0.00 |
| Metronome Practice | Use steady clicks to refine timing and integrate pick direction | 0 | $0.00 |
| Listening + TAB | Combine ear training with reading to confirm strumming patterns | 0 | $0.00 |
| Groove Matching | Adjust dynamics and pick attack to match the song’s feel | 0 | $0.00 |
Practice switching between pick direction and timing. Start slow to learn strumming patterns well. This method boosts your ability to read guitar tabs and play songs across genres.
Fingerings, Positioning, and Chord Charts vs Guitar Tab Notation
Choosing the right fingering and neck position makes playing easier and sounds better. This guide explains how to use fretting-hand finger numbers and TAB fret numbers. It also talks about when to use chord charts with TAB and how to pick the best neck position.
Fretting-hand finger numbers tell you which finger to use: 1 = index, 2 = middle, 3 = ring, 4 = pinky. TAB fret numbers show where to press, not which finger. When charts include finger numbers, follow them for smoother playing.
| Item Name | Description | Calories | Price |
|---|---|---|---|
| Index Finger (1) | Used for root positions and stabilizing across frets | 0 | $0.00 |
| Middle Finger (2) | Great for quick alternation and barre support | 0 | $0.00 |
| Ring Finger (3) | Provides reach for wider intervals | 0 | $0.00 |
| Pinky (4) | Extends range for high frets and ornamentation | 0 | $0.00 |
| Open String | No fretting finger required; indicated as 0 in TAB | 0 | $0.00 |
| Chord Chart Snapshot | Shows static finger placement for common shapes | 0 | $0.00 |
| TAB Voicing | Shows exact frets and timing for a specific voicing | 0 | $0.00 |
| Alternate Position | Same note played elsewhere for tone or ease | 0 | $0.00 |
| Suggested Fingering | Author or instructor guidance included in TAB | 0 | $0.00 |
| Fret Marker Use | Visual cue to orient left-hand positioning | 0 | $0.00 |
Fretting-hand finger numbers vs TAB fret numbers
Fretting finger numbers show which finger to use. TAB numbers tell you which fret to press. Use finger-number annotations when present. They help you learn faster and avoid awkward shifts.
When chord charts accompany TAB and how to use both
Chord charts give a quick look at shapes and are placed above lyrics or measures. Use them to learn the general shape and harmony. Use TAB to see exact voicings, single-note fills, and rhythmic details that chord charts may omit.
Choosing positions on the neck when multiple options exist
The same pitch appears in several locations on the fretboard. Pick a position for comfort, tone, or phrasing. Fret markers and octave relationships can guide you. If TAB suggests fingerings, follow them for accurate phrasing. Try multiple positions and listen for tonal differences to find the best fit.
- When learning how to read guitar tabs, look for finger-number hints to reduce hand movement.
- Use chord charts vs guitar tab to compare shape vs exact voicing before you play.
- Keep fingerings simple on fast passages to prevent tension and improve accuracy.
- If unsure, try the suggested fingering, then experiment with an alternate position.
- Ask an instructor or consult method books for position choices that match your style.
- Record yourself to hear tonal differences between positions.
These steps help you understand chord charts vs guitar tab and fretting finger numbers. This way, you can confidently apply how to read guitar tabs in real practice.
Practical Tips to Learn and Practice Reading Guitar Tabs Faster
Start with short, clear exercises that build confidence. Choose an easy guitar tab for beginners and play single-note riffs slowly. Focus on accuracy before speed. Use a metronome to increase tempo in small steps.
Practice items and small gear list to keep on the practice table:
| Item Name | Description | Calories | Price |
|---|---|---|---|
| Clip-on Tuner | Quick tuning for accurate pitch before each session | 0 | $19.99 |
| Metronome App | Steady tempo control for gradual speed increase | 0 | Free–$4.99 |
| Beginner Songbook | Collection of easy guitar tab for beginners and simple riffs | 0 | $12.99 |
| Guitar Picks Pack | Different gauges to test tone and attack | 0 | $6.50 |
| Practice Notebook | Record tempos, trouble spots, and progress notes | 0 | $4.00 |
| Footstool | Comfortable posture for longer sessions | 0 | $14.00 |
| Fretboard Marker Stickers | Visual cues at 3, 5, 7, 9, 12 frets to orient the neck | 0 | $5.99 |
| Recording Device | Phone or recorder to capture practice for review | 0 | $0–$199 |
| String Winder | Speeds up string changes to keep practice consistent | 0 | $7.50 |
| Comfort Strap | Supports posture during standing practice | 0 | $10.00 |
Technique tips to apply in short daily sessions:
- Listen while you read each line of TAB. Many transcriptions lack rhythm; use recordings to learn phrasing and timing.
- Isolate tricky bars and loop them until your hands memorize the motion.
- Check tuning before playing. A clipped tuner, like a Korg or Snark, saves time and keeps pitch reliable.
- Use fret markers to find positions quickly. Visual cues at 3, 5, 7, 9, 12 cut down searching time.
- Practice muting and palm-muted dynamics to match the tone in the tab or recording.
How to combine resources for steady progress:
- Follow a beginner guitar tabs tutorial to learn notation basics and common symbols.
- Pair that tutorial with an easy guitar tab for beginners and practice one song per week.
- Work with an instructor or structured online lessons to clarify ambiguous symbols and fingerings.
- Record practice sessions to evaluate timing and tone, then adjust focus areas.
When you learn to read guitar tabs, consistent daily practice beats occasional long sessions. Keep goals small. Celebrate small wins like nailing a riff at tempo or playing a whole phrase without mistakes. This steady approach speeds skill gains and keeps practice enjoyable.
FAQ
- How long before I can read simple tabs? About two to four weeks with daily 20-minute practice sessions.
- Should I always use the recording when learning a tab? Yes, it clarifies rhythm and phrasing that many tabs omit.
- Can a teacher speed up my progress? Yes. A teacher spots bad habits, suggests fingerings, and explains unclear symbols.
- Is a metronome necessary? Strongly recommended. It builds steady rhythm and helps increase tempo safely.
- How to handle tricky sections? Slow them down, loop them, then raise tempo in 5% increments.
- Are fret markers important for beginners? Very helpful. They speed orientation and reduce mistakes on the neck.
- Where to start practicing? Pick an easy guitar tab for beginners and a short riff from a book or tutorial.
Conclusion
Guitar tabs are like a map for your fingers, showing where to play notes and chords. This guide covered the basics of reading tabs, including the six-line staff and string order. It also explained important symbols like h, p, /, \, b, PM, x, ~, and t.
Learning to read tabs is faster than starting with standard notation. It helps you learn riffs, chords, and solos quickly.
Start by mastering basic techniques like hammer-ons and slides. Begin with simple tabs and listen to recordings to improve rhythm. Use tools like a tuner and metronome to help.
Practice regularly, even if it’s just for a few minutes. Celebrate small victories like playing a riff cleanly. Over time, you’ll get better at reading tabs and playing music.
Next, try playing easy songs and listen carefully to the rhythm. Use a metronome to improve timing. If you want to learn faster, consider taking lessons.
With consistent practice and a good tab guide, reading tabs will become easy. You’ll play with more confidence and skill.