Learn How to Play Bass Guitar – Quick Guide
Starting as a beginner is normal. Every great player was once a beginner. The best thing to do is relax and start playing.
This quick guide will teach you the basics of playing bass guitar. It also points you to reliable learning paths. So, you can start playing well right away.
Practice with amplification so you hear your sound as others will. Plug the bass into your amp with an instrument cable. Make sure the amp is plugged in but turned off while connecting.
Use the amp input jack, then power the amp on. Reading your specific amp and bass manuals is helpful. But, you only need to know a few things at first: volume, EQ basics, and gain.
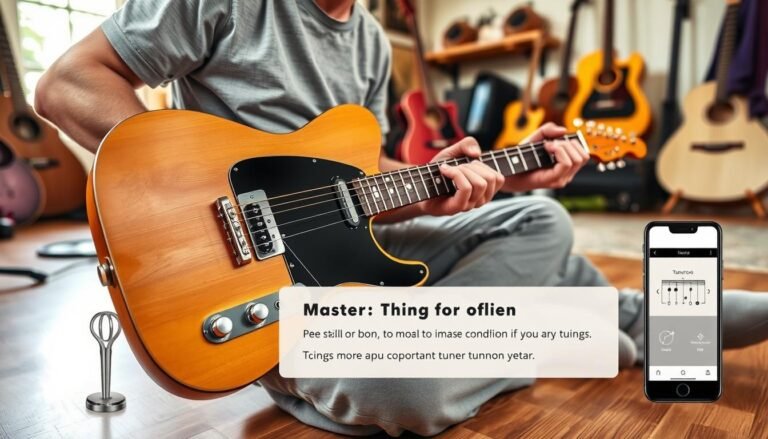
Structured courses help you learn faster. TalkingBass offers step-by-step lessons from beginner to advanced. This includes topics like slap, sight reading, and ear training, with support from a large community of players.
StudyBass provides Fundamentals One, Two, and Three curricula. These include exercises, notation, and fretboard work to guide your learning. They help you learn to play bass guitar.
If you want clear progress, follow a short curriculum. Track your practice and use the resources above for organized guidance. These beginner bass guitar lessons and learning methods are designed for steady improvement without feeling overwhelmed.
Getting Started with Your First Bass Lesson

Starting out can feel awkward. Expect to fumble at first, breathe, and keep a relaxed mindset. Every player began with zero experience. A kind, steady approach helps you enjoy beginner bass guitar lessons and stay motivated.
Mindset for absolute beginners
Accept small mistakes as part of learning. Break practice into short sessions so progress feels steady. Use a tuner and simple goals to build confidence. When you focus on small wins, learning to play bass guitar becomes less intimidating.
What to expect in your first practice session
The first session covers basics: how to hold the instrument, simple plucking and fretting, and a quick amp setup to hear your sound. You will plug in, set a neutral amp tone, and try basic finger exercises. Practicing amplified helps you learn tone and feel.
Overview of the step-by-step learning path
A clear path speeds progress. Begin with posture and single-note exercises, move to timing and simple grooves, add music theory and scales, then learn songs and apply tone control. Many students follow structured courses like TalkingBass or StudyBass Fundamentals One for guided lessons and exercises.
| Item Name | Description | Calories | Price |
|---|---|---|---|
| Short Warm-up | Single-string plucks and chromatic fretting for finger coordination | 0 | $0 |
| Starter Groove | Simple root-note patterns to develop timing and feel | 0 | $0 |
| Tuner Check | Clip-on or pedal tuning to ensure accurate pitch | 0 | $0 |
| Technique Drill | Alternate plucking and thumb anchor exercises | 0 | $0 |
| Guided Lesson | Structured lesson from a course to build a practice plan | 0 | $0 |
| Song Application | Simple song to apply new skills and stay motivated | 0 | $0 |
| Cooldown | Light stretching and slow scales to end the session | 0 | $0 |
Follow a seven-step plan from zero to first song: posture, tuning, basic plucks, fretting accuracy, timing drills, simple songs, and review. Use free accounts on established platforms for structured tracks and downloadable exercises. This keeps your learning to play bass guitar steady and measurable.
Choosing the Right Bass and Gear for Beginners
Choosing the right bass and gear is key for beginners. It helps you focus on learning without distractions. Knowing the basics of body styles, accessories, and electronics is important.

Types of basses: P bass vs J bass and other common styles
The Fender Precision (P bass) and Jazz (J bass) are great for beginners. The P bass has two knobs for volume and tone. The J bass has three knobs for more control over the sound.
Other styles include short-scale basses for smaller hands and active-electronic basses for more tone options. Brands like Fender, Squier, Yamaha, and Ibanez offer good beginner options.
Essential accessories: strap, cable, tuner, picks
A padded strap keeps the bass in the right position. Use a quality cable to connect to the amp. A tuner keeps your bass in tune. Picks are optional, as most teachers teach finger technique first.
Adjust the strap so the bass feels the same sitting or standing. This makes learning easier and reduces strain. Keep your bass clean with cloths and a maintenance kit.
Intro to active vs passive electronics and battery care
Passive pickups don’t need power and give classic tones. Active pickups need a battery for more tone options. If the sound weakens, check the battery first.
Active circuits add controls for bass and treble. Learning to care for batteries and electronics helps you practice without interruptions.
| Item Name | Description | Calories | Price |
|---|---|---|---|
| Fender Squier P Bass | Classic Precision tone, simple two-knob layout, great for roots and rock. | 0 | $249 |
| Fender Squier J Bass | Versatile Jazz-style pickups, three-knob control for tonal blending. | 0 | $279 |
| Yamaha TRBX174 | Short-scale friendly, comfortable neck, balanced passive tone. | 0 | $229 |
| Ibanez GSR200 | Lightweight body, smooth neck, active-like sculpted EQ feel. | 0 | $269 |
| Padded Strap | Adjustable nylon with padding to keep bass position stable. | 0 | $19 |
| Instrument Cable (10 ft) | Shielded cable for low-noise practice and reliable signal. | 0 | $15 |
| Clip-on Tuner | Fast visual tuning, easy to use in lessons and on stage. | 0 | $12 |
| Practice Amp (10–20W) | Compact amp with input and headphone out for silent practice. | 0 | $99 |
| Battery (9V) | Power for active electronics; keep a spare to avoid downtime. | 0 | $4 |
| Cleaning Kit | Cloth, polish, and string cleaner to preserve finish and tone. | 0 | $14 |
Setting Up Your Amplifier and Signal Chain
Having a clean and safe setup helps you focus on playing. First, make sure the amp is unplugged and turned off. Then, connect a good instrument cable from the bass output jack to the amp’s input labeled “input.” If you’re using headphones, Bluetooth, or an audio interface, set them up first before turning on the amp. This keeps your gear and ears safe while you learn.
Once cables are in place, turn on the amp. Set all EQ and tone knobs to 12 o’clock as a starting point. Keep the amp volume low, then slowly increase it to a good level for your space and neighbors. Use the bass’s volume control to get the sound right, and adjust the amp volume for overall loudness.
Adjust gain and volume to keep the sound clean. Turn the gain up until you get a slight warmth, then back off to avoid distortion. If you hear distortion, lower the output or amp gain. Check your amp manual for special controls like pad, boost, or active/passive switching. These tips will help you keep your sound clear and reliable.
Try changing the knobs one at a time while following a bass guitar tutorial or lessons from StudyBass and TalkingBass. Listen and note the changes. This habit helps you learn faster and understand how tone controls work with your playing.
| Item Name | Description | Calories | Price |
|---|---|---|---|
| Fender Precision Bass | Classic single-split pickup, punchy low end, great for rock and pop | 0 | $899 |
| Fender Jazz Bass | Two single-coil pickups, brighter mids, flexible tonal options | 0 | $999 |
| Ampeg BA-110 | Compact practice amp, simple EQ, integrated headphone out | 0 | $199 |
| Markbass Mini CMD | Lightweight combo with clear mids and footswitchable options | 0 | $749 |
| Darkglass Microtubes | Preamp/overdrive pedal, versatile drive tones, blend control | 0 | $229 |
| Boss TU-3 | Precision chromatic pedal tuner, rugged road-ready build | 0 | $99 |
| Planet Waves Cable | Shielded instrument cable, reliable connection, low noise | 0 | $29 |
| Headphones (Closed) | Practice silently with accurate low-frequency response | 0 | $149 |
| Audio Interface | Connect bass to DAW, direct monitoring, low-latency tracking | 0 | $129 |
| DI Box | Convert instrument to balanced line for PA or recording | 0 | $99 |
Practice these signal chain basics with a structured lesson to build good habits. Clear tone control and safe powering habits are key tips for playing bass guitar well.
Comfortable Playing Position and Ergonomics
Good posture is key to making progress when learning to play bass guitar. Adjusting your seat height, strap length, and neck angle helps you stay relaxed. It also supports your long-term health.
Sitting posture and strap height recommendations
Sit with your hips level with or slightly above your knees. This protects your lower back and keeps the bass stable. Right-handed players often place the bass over their right leg.
Some prefer the bass on the opposite leg for easier access to upper frets. But this can make low notes harder to play.
Keep the strap on while seated. Attach it to the top horn and the side button near the bridge. Set the strap height so the bass feels the same whether you’re sitting or standing. This makes it easier to switch between practice and performance.
Bass neck angle and headstock positioning for reach
Angle the neck slightly upward, not perfectly parallel to the floor. This improves access to the frets and reduces wrist strain. Push the headstock gently away to form a 30–40 degree angle with your chest.
This position helps you reach higher on the neck. It keeps your fretting movements small and controlled. This is important for techniques like shifts and slides.
Tips to avoid tension and long-term injury
Keep your shoulders, elbows, and wrists relaxed. Avoid jamming your thumb into the back of the neck. Instead, let it rest lightly behind the neck or in a neutral spot.
Maintain neutral wrist alignment to reduce tendon stress. Vary your posture during longer sessions and take short breaks to stretch. Regular breaks help prevent overuse injuries.
These tips work well with study routines from resources like StudyBass. They emphasize consistent ergonomics for solid technique.
| Item Name | Description | Calories | Price |
|---|---|---|---|
| Adjustable Strap | Wide, padded strap that keeps bass stable seated or standing | 0 | $24.99 |
| Ergonomic Stool | Height-adjustable stool for proper hip-to-knee alignment | 0 | $69.00 |
| Neck Support Pad | Small cushion to relieve lower back and allow proper tilt | 0 | $12.50 |
| Clip-On Mirror | Reflects wrist and thumb position during practice for self-checks | 0 | $9.95 |
| Stretch Guide | Quick routines to reduce tension between practice segments | 0 | $4.99 |
| Practice Timer | Interval timer to enforce breaks and focused practice blocks | 0 | $6.00 |
| Fretboard Marker | Removable dots to help visualize neck navigation and posture | 0 | $7.50 |
| Posture App Subscription | Guided posture checks and reminders tailored for musicians | 0 | $3.99/mo |
| Lightweight Headstock Clamp | Helps set consistent neck angle for practice sessions | 0 | $11.25 |
| Hand Warm-Up Tool | Simple device for finger and wrist warm-ups before playing | 0 | $8.99 |
By making these adjustments, you can improve your bass playing. Use consistent posture and incorporate these tips into your practice. This will make complex techniques feel natural over time.
Tuning the Bass and Learning String Names
Before you start playing, make sure your bass is in tune. This guide will help you learn standard tuning and how to use a tuner. It also includes ear-training tips to get you playing faster.
Standard tuning has four strings: E A D G. Remember them with the phrase “Eat And Drink Grapes.” Say it before tuning each string to remember the order.
Here’s a table to help you choose the right tuner for your needs.
| Item Name | Description | Calories | Price |
|---|---|---|---|
| Clip-on tuner | Attaches to headstock and senses vibration; works in noisy rooms | 0 | $15–$30 |
| Pedal tuner | Floor unit for stage use; mutes signal while you tune | 0 | $50–$150 |
| Plug-in tuner | Connect into amp or audio interface for studio accuracy | 0 | $20–$100 |
| Smartphone apps | Portable and easy for quick checks; less accurate in loud settings | 0 | Free–$10 |
Standard tuning: E A D G and remembering mnemonics
Start with the low E string and go up to G. Tighten the peg to raise the pitch, loosen to lower it. Tune each string until it matches the target pitch on your tuner.
Using clip-on, pedal, and plug-in tuners
Clip-on tuners are perfect for home practice and loud places. Pedal tuners are great for live shows, keeping the sound off while you tune. Plug-in tuners offer precise readings in recording setups.
How to tune by ear and when to rely on a tuner
For beginners, use electronic tuners. Tuning by ear takes time and practice. Start with a tuner and then use resources like TalkingBass and StudyBass to improve your ear tuning skills.
Practice tuning, play an open string, compare it to the tuner, and adjust. Regular tuning keeps your sound consistent and helps you learn faster.
Use these tips every time you practice. They help you focus on playing well, without worrying about tuning issues.
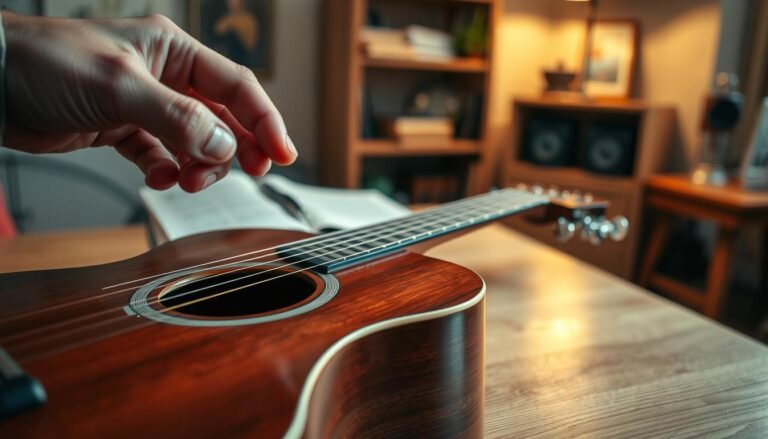
Basic Plucking Technique and Tone Control
Good tone and rhythm start with three simple habits. These core techniques give your bass lines clarity, power, and control. Start slow, then speed up as you get better. These tips will help you shape your sound and build reliable habits.
Thumb anchor
Place your thumb on the low E or A string. Or, gently on the neck pickup if your bass has one. This anchor keeps your plucking hand steady. It helps you play evenly and avoid finger flaring.
Alternate plucking
Use your index and middle fingers in an alternating pattern. This method balances speed and endurance. It’s great for beginners. You can also try one-finger or three-finger styles, but alternating is key for clean timing.
Pull across the string
Pull the string across toward the next string or your thumb. This creates a fuller tone. Adjust your plucking spot to change the sound. Pluck closer to the bridge for brightness or closer to the neck for roundness.
| Item Name | Description | Calories | Price |
|---|---|---|---|
| Thumb Anchor Drill | Hold thumb on low string while alternating index/middle at 60 BPM | 0 | $0 |
| Alternate Pluck Routine | 8-bar exercise focusing on even tone and timing | 0 | $0 |
| Pull-Across Tone Study | Compare bridge vs neck plucks to hear tonal change | 0 | $0 |
| Combined Flow | Integrate anchor, alternate fingers, and pull-across for grooves | 0 | $0 |
Practice these elements in short, focused sessions. Use a metronome and recordings to track your progress. These basics are essential for mastering the bass guitar.
Bass Guitar Exercises for Beginners
Begin with short, focused drills to improve timing, muting, and fretboard skills. These exercises are perfect for beginner bass guitar lessons and solo practice. Keep your practice sessions short, aim for a steady tempo, and track small improvements each day.
Start with single-string plucking. Hold your thumb on the pickup to keep your hand steady. Pluck the open E string with your index finger on beat 1 and your middle finger on beat 3. Count 1–2–3–4 aloud and mute on beats 2 and 4.
Use a light touch with your fretting hand or plucking fingers to mute the string. Combining both muting methods will give you a cleaner sound.
Next, try the count-and-play groove drill. Play a simple downbeat pattern to improve your rhythm. Use a metronome set to a comfortable tempo. Play on beats 1 and 3 while muting on 2 and 4.
This drill helps you develop a strong internal pulse and introduces basic bass techniques. Only increase the speed when you can stay steady for several minutes.
Practice fretboard markers by focusing on the 5th and 7th frets on the E string. Play the 5th fret, then the 7th fret, keeping your fretting hand relaxed. Place your finger just behind the fret wire for clear notes.
Repeat slowly, using the dot markers as guides. Then, move the same pattern across other strings to map the neck.
Use backing tracks and structured lessons from resources like TalkingBass and StudyBass to add context to your drills. Playalong tracks help you feel the band sound and apply your lessons in musical settings. Rotate exercises to keep practice varied and focused on real-world groove.
Short checklist for each practice session:
- Warm up 2–3 minutes with single-string plucking.
- Work 3–5 minutes on downbeat counting and muting.
- Spend 5 minutes on 5th/7th fret patterns and position shifts.
- Finish 5 minutes with a playalong track to test timing.
| Item Name | Description | Calories | Price |
|---|---|---|---|
| Single-String Drill | Index on beat 1, middle on beat 3, mute on 2 and 4 | 0 | $0 (practice) |
| Downbeat Groove | Play on downbeats with metronome to build pulse | 0 | $0 (practice) |
| 5th & 7th Fret Map | Fret placement behind the wire; use dot markers | 0 | $0 (practice) |
| Muting Techniques | Fretting-hand palm touch and plucking-hand stop | 0 | $0 (practice) |
| Playalong Tracks | Backing tracks for timing and groove practice | 0 | Varies |
| Metronome Routine | Steady tempo work for counting and timing | 0 | $0–$10 (apps) |
| Alternate Fingers Drill | Index/middle alternation to build speed | 0 | $0 (practice) |
| Position Shift Exercise | Move between 5th and 7th fret across strings | 0 | $0 (practice) |
| Relaxation Check | Short breaks to keep form relaxed and tension-free | 0 | $0 (practice) |
| Structured Lesson Slot | Weekly guided session to review technique progress | 0 | $20–$50 |
Make these drills a regular part of your routine to learn bass guitar effectively. Use them to support your beginner lessons and develop essential techniques for tight, confident grooves.
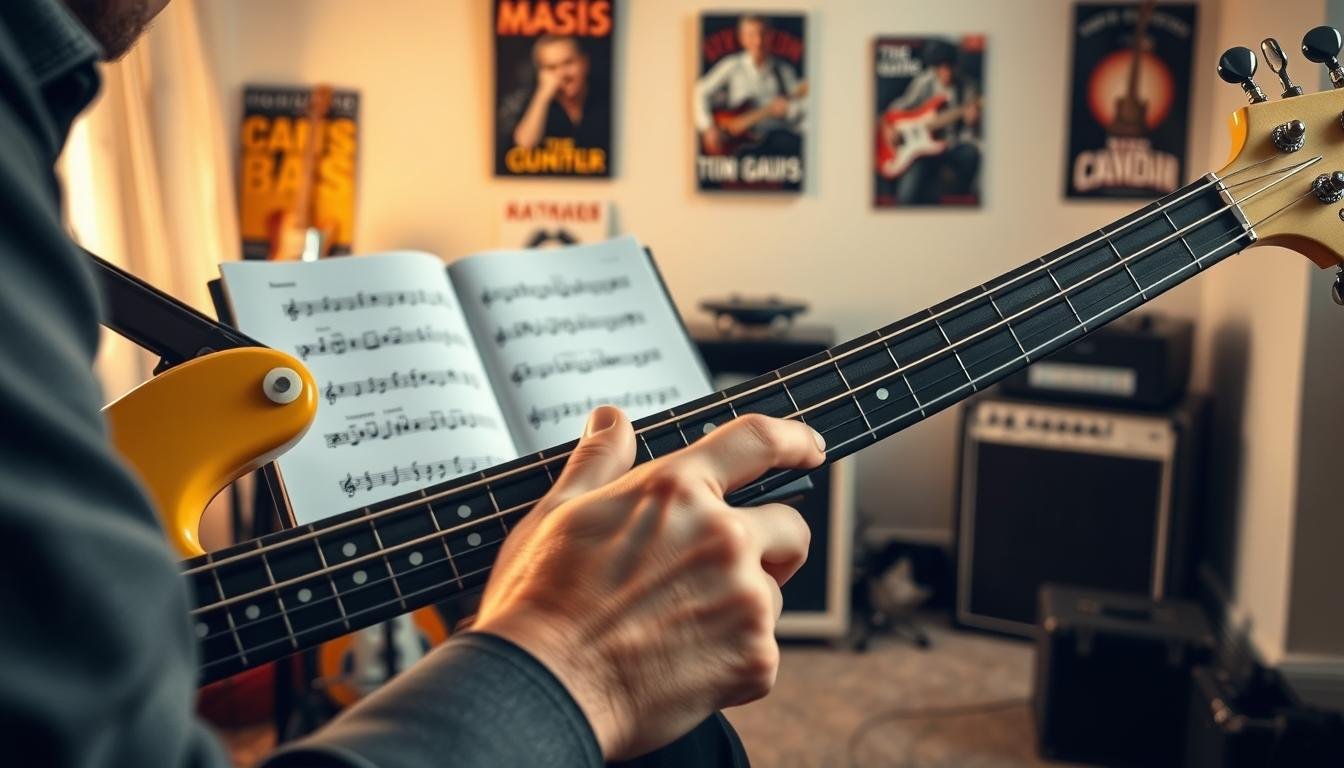
Fretting Hand Technique and Clean Notes
Good fretting starts with a calm, natural posture. Relax your shoulders and let your elbow hang loosely. Find a hand shape that feels easy, then place the bass there.
Keep your wrist straight or slightly bent forward. Your fingers should curve and touch the strings with the pads, not the tips. This neutral wrist reduces strain and keeps your notes clean.
Thumb placement and avoiding excess tension
Let your thumb sit where it feels natural, either behind the neck or pointing toward the headstock. Avoid forcing it directly behind the middle finger. A tense thumb causes pain and slows learning.
Where to press for clean tone
Press the string just behind the fret wire, near the end closest to the pickups. Use just enough pressure to stop buzzing. Pressing too hard wastes energy and bends pitch.
Practice a simple drill: fret the 5th and 7th frets on the low E string using alternate fingers. Play slowly and listen for buzz. This exercise builds finger independence and reinforces clean fretting.
| Item Name | Description | Calories | Price |
|---|---|---|---|
| Relaxed Wrist Drill | Slow chromatic fretting across two frets, focus on wrist alignment | 0 | $0 |
| Thumb Placement Check | Play single notes while testing thumb behind neck or near headstock | 0 | $0 |
| 5th–7th Fret Accuracy | Alternate fingers on E string to build independence and reduce buzz | 0 | $0 |
| Minimal Pressure Practice | Gradually reduce finger force until buzzing returns, then slightly increase | 0 | $0 |
| String Pad Positioning | Focus on using the finger pads, not tips, for full contact | 0 | $0 |
| Shifts and Slides | Combine fretted notes with small slides to smooth transitions | 0 | $0 |
| Tempo Control | Use a metronome to keep consistent timing while fretting cleanly | 0 | $0 |
| Finger Independence | Isolate weaker fingers with targeted repetitions | 0 | $0 |
| Endurance Sets | Short, repeated rounds to build stamina without tension | 0 | $0 |
| Buzz Detection | Play at varying dynamics to find and fix buzzing notes | 0 | $0 |
Use these exercises with steady practice. Each small improvement in fretting technique leads to cleaner notes and stronger groove. For those learning how to play bass guitar, these tips form a practical path to faster progress.
Bass Guitar Techniques to Improve Groove and Timing
Improving your groove and timing starts with daily practice. Begin by mastering clear muting. Then, practice with backing tracks to enhance your feel. Start with simple rhythmic patterns, count steadily, and slowly add syncopation. These steps are key to mastering the bass guitar.
Muting techniques
Practice using a light touch with your fretting hand to stop strings after playing a note. Use your plucking hand to mute before the next note, keeping sounds short and crisp. This creates space and pocket in your playing. Make these techniques automatic with slow exercises.
Playing with backing tracks
Start with a metronome to get your timing right. Then, use playalong tracks from trusted sources like TalkingBass and StudyBass. Practice plucking single strings and rhythmic patterns while counting out loud. This helps you play in sync with a band and improves your feel.
Basic rhythmic patterns and syncopation tips
Focus on downbeats first, stressing beats 1 and 3 in simple grooves. Add syncopation once you can keep steady subdivisions. Use short exercises to repeat patterns, then vary rests and accents for interest. Counting out loud while playing helps you feel the pulse.
| Item Name | Description | Calories | Price |
|---|---|---|---|
| Muting Drill | Fretting and plucking hand coordination for deadening strings | 0 | $0 |
| Metronome Session | Slow to fast subdivisions to build steady time | 0 | $0 |
| Playalong Groove | Backing track practice focusing on pocket and dynamics | 0 | $0 |
| Syncopation Drill | Accent-shift exercises to develop offbeat feel | 0 | $0 |
| Single-String Timing | Repeated single-string lines to refine attack and release | 0 | $0 |
| Subdivision Counting | Counting 8ths and 16ths while playing to lock subdivisions | 0 | $0 |
| Accent Practice | Place accents on different beats to shape groove | 0 | $0 |
| Rest Placement | Use rests to create space and rhythmic interest | 0 | $0 |
| Tempo Transition | Practice moving between tempos without losing pocket | 0 | $0 |
| Recording Review | Record practice and compare to backing track for timing | 0 | $0 |
- Start each session with a short muting warm-up from the table above.
- Use metronome then backing tracks to bridge mechanical timing with musical feel.
- Repeat bass guitar exercises at multiple tempos to strengthen rhythmic control.
Regular practice of these techniques will improve your bass playing. Keep exercises short and focused to ensure progress and build confidence.
Learning to Play Bass Guitar
Learning to play bass guitar is easier when you follow a clear plan. Start with simple steps that improve your skills, tone, and timing. Use reliable lessons and celebrate small victories to stay motivated.
Structured lesson paths make practice easier. A seven-step plan starts with setting up your gear. It then covers plucking, fretting, muting, and rhythm. Next, it introduces exercises, songs, and playalongs, and ends with tracking your progress.
StudyBass offers a three-part curriculum for beginners. It includes technique, notation, songs, and more. Use these modules to pace yourself and review tricky topics.
TalkingBass has courses for all levels, from beginner to advanced. Topics include slap, sight reading, and setup tips. Free membership offers community support and practice downloads.
Pairing a course with weekly goals can speed up your progress. Choose a course that fits your schedule. A clear syllabus helps beginners.
Set measurable goals to track your progress. Log your practice time, tempos, and songs. Use course trackers or a simple journal. Aim for small milestones like playing a simple groove or mastering a short song.
| Item Name | Description | Calories | Price |
|---|---|---|---|
| Starter Course | Seven-step beginner program covering gear, plucking, fretting, and rhythm | 250 | $29 |
| StudyBass Pack | Three-level fundamentals curriculum with exercises and songs | 320 | $45 |
| TalkingBass Essentials | Structured lessons from basics to advanced techniques with community access | 300 | $39 |
| Weekly Coach | Live guided sessions and personalized feedback | 400 | $60 |
| Practice Journal | Template for logging time, tempos, and milestones | 50 | $5 |
| Playalong Pack | Backing tracks and transcriptions for common grooves | 220 | $20 |
| Ear Training Kit | Exercises to improve listening and interval recognition | 180 | $15 |
| Technique Warmups | Daily routines for plucking and fretting accuracy | 140 | $10 |
| Groove Masterset | Rhythmic patterns and syncopation practice modules | 260 | $35 |
| Song Builder | Stepwise song-learning sequence with milestone checkpoints | 200 | $25 |
Combine beginner lessons, a good tutorial, and regular practice to reach your goals faster. Celebrate small victories, adjust your targets as you improve, and stay focused. This approach helps anyone move from shaky starts to steady, musical grooves.
Practice Routine, Tips, and Common Beginner Mistakes
Consistency is key to making progress. Create a bass guitar practice routine that fits into your daily life. Aim for short, frequent sessions instead of long ones.
Start with gentle warm-ups, then focus on specific skills. Finish with a cool-down to protect your hands and keep the momentum going.
Building a sustainable daily practice routine
Try to practice for 20–40 minutes each day. Break your time into manageable blocks to track your progress without getting overwhelmed.
| Item Name | Description | Calories | Price |
|---|---|---|---|
| Warm-up | Open-string plucks and finger alternation to wake up coordination | 0 | $0 |
| Focused Practice | Tone work, fretting accuracy, and timed drills like 5th/7th fret exercises | 0 | $0 |
| Groove Work | Play with backing tracks or a metronome to lock timing | 0 | $0 |
| Cool-down | Light playing and hand stretches to reduce tension | 0 | $0 |
| Tracking | Note mistakes, tempo, and goals for the next session | 0 | $0 |
Warm-up, focused practice, and cool-down segments
Start with open-string plucks and slow finger alternation for three to five minutes. These exercises prepare your tendons and strengthen your thumb.
Focus on one or two goals in the main block. Work on tone, fretting, and timed drills like 5th and 7th fret exercises. Use a metronome and record to track your progress.
End with a cool-down: play simple grooves at low volume, stretch fingers, and relax your wrist. Regular cool-downs prevent pain and aid recovery.
Common mistakes to avoid and how to correct them
Bad posture can cause pain. Adjust your strap and seat so the neck is slightly up and your wrist is neutral.
Too much tension hurts your tone. Relax your thumb, avoid pressing it on the neck, and keep your fretting hand light. Bass guitar tips like breathing and shakes help release tension.
Plucking upward or away makes your tone thin. Practice pulling across the string for a fuller sound. Do this slowly until it feels natural.
Not muting can muddy the sound. Add muting exercises to silence open strings and unwanted overtones.
Playing out of tune wastes time. Tune at the start of each session and check often. Use electronic tuners with ear tuning drills.
Use community resources and structured lessons for accountability. Track errors, revisit basics, and use metronome-backed exercises to fix timing.
Follow these steps for efficient practice, injury prevention, and faster learning. Small, steady gains add up faster than occasional long practice sessions.
Conclusion
Start by feeling relaxed and following a clear plan. First, plug in safely and set your amp tone to neutral. Then, get into a comfortable playing position.
Begin by tuning your bass to E A D G. Focus on using your thumb as an anchor and practicing alternate plucking. These steps are key to learning how to play bass guitar.
Make practice a daily habit. Start with simple exercises like plucking the E-string while muting and practicing at the 5th and 7th frets. Later, add the pull-across technique for a richer sound.
Use tools like tuners and playalongs to help you improve. Structured courses like TalkingBass or StudyBass can also guide you. This mix of basics and songs helps you master the bass guitar.
Set achievable goals and keep track of your practice time. Focus on playing cleanly and comfortably. Resources and courses can boost your skills and confidence.
With regular practice and these tips, you can go from beginner to confident bass player. It’s definitely possible.